Build a Jumboshack sender
Turn a Raspberry Pi into a live feed of your geothermal heat pump. It reads your WaterFurnace Aurora control over its Modbus bus, once a minute, and streams the numbers to your Jumboshack dashboard. No soldering, no cloud middleman, and your data stays yours.
💡 You don't need an expensive Pi — that's the point
Jumboshack's sender is pure Python, written to run happily on the smallest, cheapest Wi-Fi Raspberry Pis. A Pi Zero 2 W (or the original Zero W) sips power and costs a fraction of a performance board — no $130 Pi 5 required.
- The exact kit we run: CanaKit Zero W Complete MAX Kit (64 GB) — $79.99 — plus the FTDI RS-485 adapter (~$12) and a Cat5e cable (~$5) ⇒ ≈$95 all-in.
- Want to spend less? A bare Pi Zero 2 W with your own microSD, power and case lands lower still — the sender doesn't need much.
Either way, well under a ~$130+ Pi 5 kit. Prices are ballpark and move — check the live links.
Build my setup →How it fits together
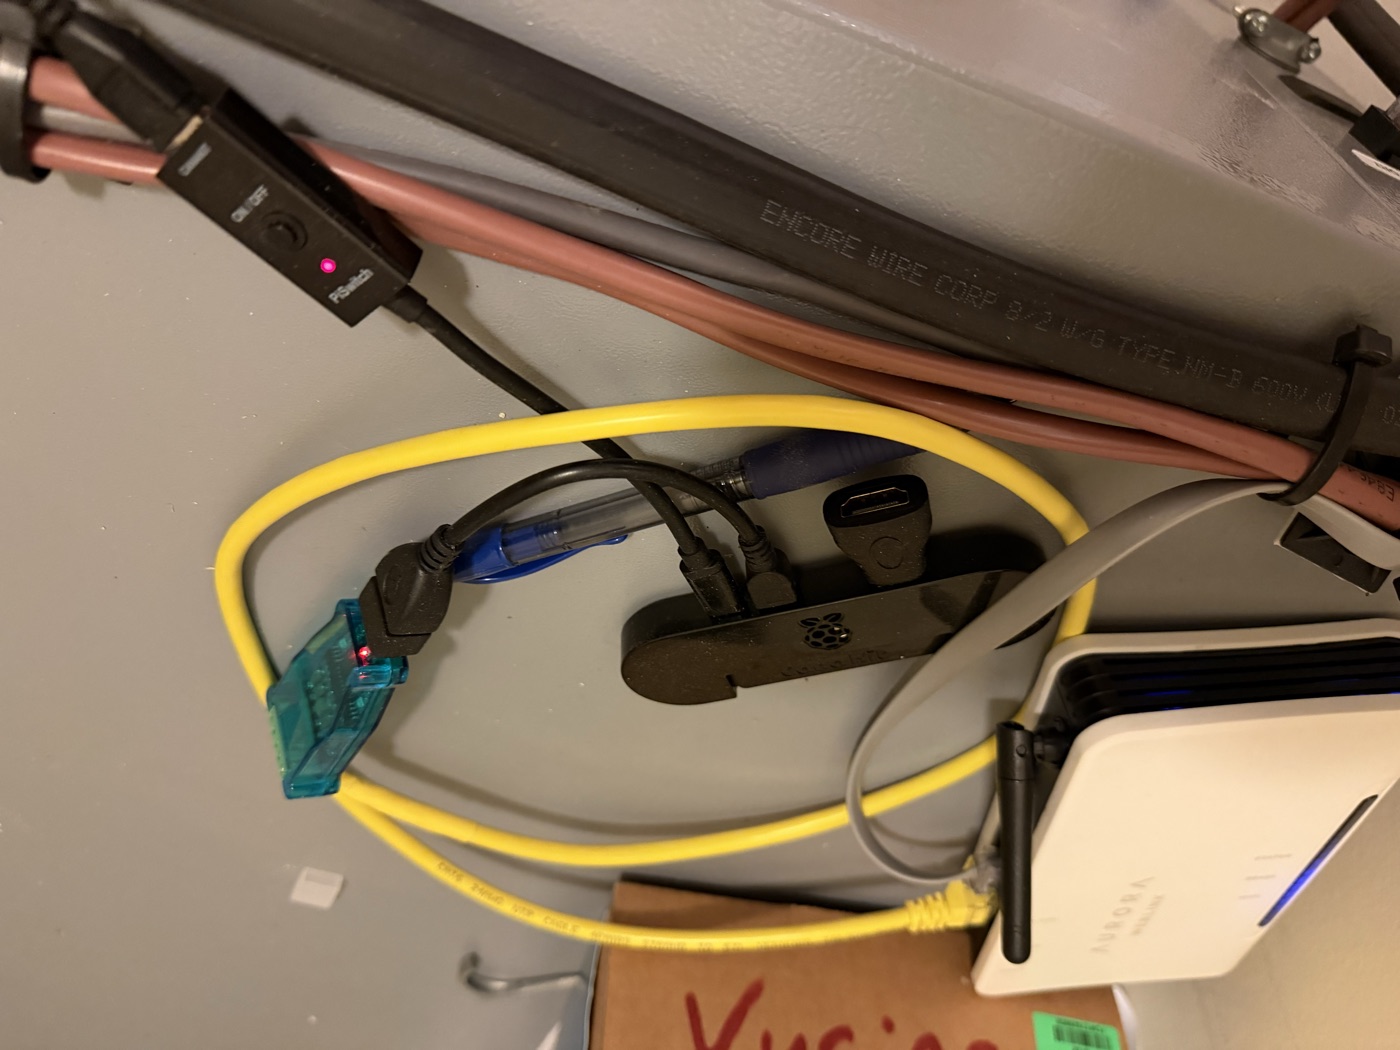
Two small pieces do the work. A USB-to-RS485 adapter gives the Pi a wire into your heat pump's Modbus bus, and a small pure-Python reader — light enough to run on a $15 Pi Zero 2 W over Wi-Fi — pulls the registers and streams each reading to Jumboshack over HTTPS:
  WaterFurnace Aurora ──(RS-485 / Modbus)── USB adapter ── Raspberry Pi
                                                              │
                                    fetch_modbus.py (native Python) → push (HTTPS)
                                                              │
                                                  ingest.jumboshack.com → your dashboard
It runs from cron every minute and is read-only — it only ever reads registers;
it never sends anything back to your equipment. If the network hiccups, the reading is spooled and
retried, so a blip never costs you data.
Gather the parts
Everything here is off-the-shelf. If you already run a home lab, you probably have half of it in a drawer. Prices are ballpark.
1a · Pick a Raspberry Pi
The sender is featherweight — it reads the Modbus bus and POSTs once a minute — so even the smallest Pi is plenty. Choose on budget vs. convenience. The CanaKit kits bundle the microSD card, power supply, and case, so if you buy a kit you can skip section 1c entirely.
Availability note: the tiny Pi Zero kits have been frequently out of stock lately. If they are, the CanaKit Pi 3 B+ Starter Kit below is a reliable in-stock complete kit and works great. Stock and prices move — check the live links.
| Option | Best for | ~Price |
|---|---|---|
| Raspberry Pi Zero 2 W — board only | Cheapest and lowest power draw. Ideal for a dedicated sender if you'll add your own SD / power / case. | ~$18 |
| CanaKit Pi Zero 2 W Starter Kit | Same tiny Pi, but microSD + power supply + case in one box — the simplest complete start. | ~$40 |
| CanaKit Raspberry Pi 3 B+ Starter Kit (32 GB) ✅ in stock now | A complete kit (board, microSD, power, case) — our go-to right now, since the tiny Zero kits keep selling out. Full-size ports; plenty for the sender. | ~$110 |
| CanaKit Pi Zero W Complete MAX Kit (64 GB) ★ what we run | The exact complete kit running our own Jumboshack senders — the original Zero W, more than enough for the job. It's the MAX (64 GB) edition, so it costs more than a basic kit; buying fresh, the Zero 2 W above is faster for the same footprint and less money. | $79.99 |
| CanaKit Pi 4 (4 GB) Starter Kit | Full-size USB-A ports and extra headroom if this Pi will run other things too. Complete kit. | ~$100 |
| Raspberry Pi 5 (8 GB) — board only | The bare Pi 5 if you already have an SD card, power supply, and case — most horsepower for the money. | ~$80 |
| CanaKit Pi 5 Starter Kit PRO — Turbine Black (128 GB, 8 GB RAM) | Most capable — overkill for the sender alone, great if it's also your home-lab box. | ~$260 |
1b · The RS-485 tap (required)
| Part | Why | ~Price |
|---|---|---|
| USB-to-RS485 adapter (FTDI-based) | Required. The wire into your heat pump's Modbus bus. FTDI-based adapters are the most reliable and show up as /dev/ttyUSB0. Avoid cheap MAX485-only boards. |
$10–15 |
| 3 ft Cat5e patch cable (to sacrifice) | The Aurora's AID Tool port is an RJ-45 jack. A short Cat5e (or Cat6) cable, cut at one end, gives you the exact twisted pairs to land on the adapter (see step 3). Category doesn't matter at Modbus speeds — Cat5e is plenty; plain Cat5 is obsolete, skip it. | ~$5 |
| Ferrule kit + crimper (optional) | Clean, secure terminations into the adapter's screw terminals. Optional but tidy. | ~$10 |
1c · Add these only if you didn't buy a kit
| Part | Why | ~Price |
|---|---|---|
| microSD card (32 GB, name-brand) | Holds Raspberry Pi OS and the sender. Name-brand cards last far longer. | ~$8 |
| Power supply for your Pi model | Use the correct one — under-powered Pis misbehave in confusing ways. | ~$10 |
| CanaKit PiSwitch — inline power switch | Optional: a USB-C on/off switch so you can cleanly power-cycle the sender without yanking the plug — handy for an always-on box by the air handler. | ~$10 |
| Case (optional) | Keeps the Pi tidy near the air handler. Any case for your model works. | ~$8 |
As an Amazon Associate, Jumboshack earns from qualifying purchases. Some links above are affiliate links — if you buy through them we may earn a small commission at no extra cost to you. We only list parts we actually use.
Tracking air quality? A WiFi Airthings View Plus (radon + CO₂ + VOC + PM) or View Radon streams into Jumboshack too — follow the air-quality setup guide. (Affiliate links.)
Flash the Raspberry Pi
Use the official Raspberry Pi Imager. Choose Raspberry Pi OS Lite (no desktop needed), and in the Imager's settings (the ⚙️ gear) before you write:
- Set a hostname you'll recognize, e.g.
pi-geo - Enable SSH and set a username/password (or drop in your SSH key)
- Enter your Wi-Fi details (or plan to use Ethernet)
Write the card, pop it in the Pi, and power up. Give it a minute, then connect:
ssh pi@pi-geo.localWire it to your Aurora
The Aurora's AID Tool port is a standard RJ-45 jack carrying the RS-485 (Modbus) bus. The cleanest tap is a cheap Ethernet cable: plug it into the AID port, cut off the far end, and land the two data pairs on your USB-RS485 adapter's A (D+) and B (D−) screw terminals — keeping each pair twisted right up to the terminal for a clean signal.
  WaterFurnace AID Tool port — RJ-45 jack (standard T568B Ethernet colors)
  ─────────────────────────────────────────────────────────────────────────
    RJ-45 pin 1  white/orange ┐
    RJ-45 pin 3  white/green  ┴── twist ──►  RS-485 adapter:  A   (D+ / TXD+)

    RJ-45 pin 2  orange       ┐
    RJ-45 pin 4  blue         ┴── twist ──►  RS-485 adapter:  B   (D- / TXD-)

    other pins (24 VAC + unused) ─────────►  DO NOT connect or short
  ─────────────────────────────────────────────────────────────────────────
    RS-485 adapter ──── USB ────►  Raspberry Pi          →  /dev/ttyUSB0
    serial: 19200 baud · 8 data bits · ODD parity · 1 stop bit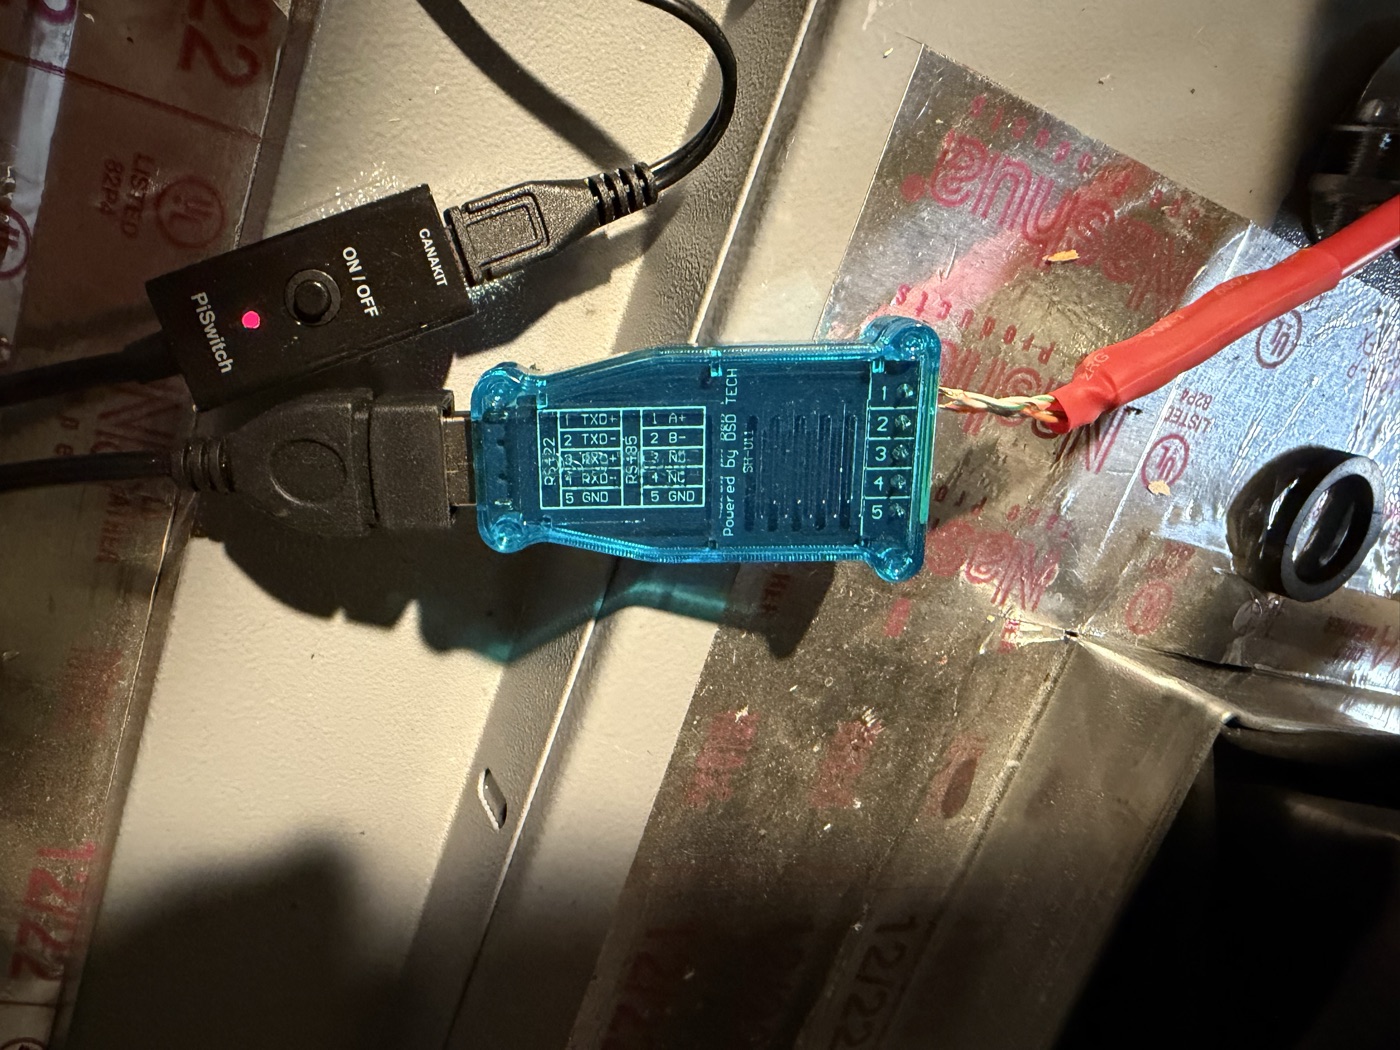
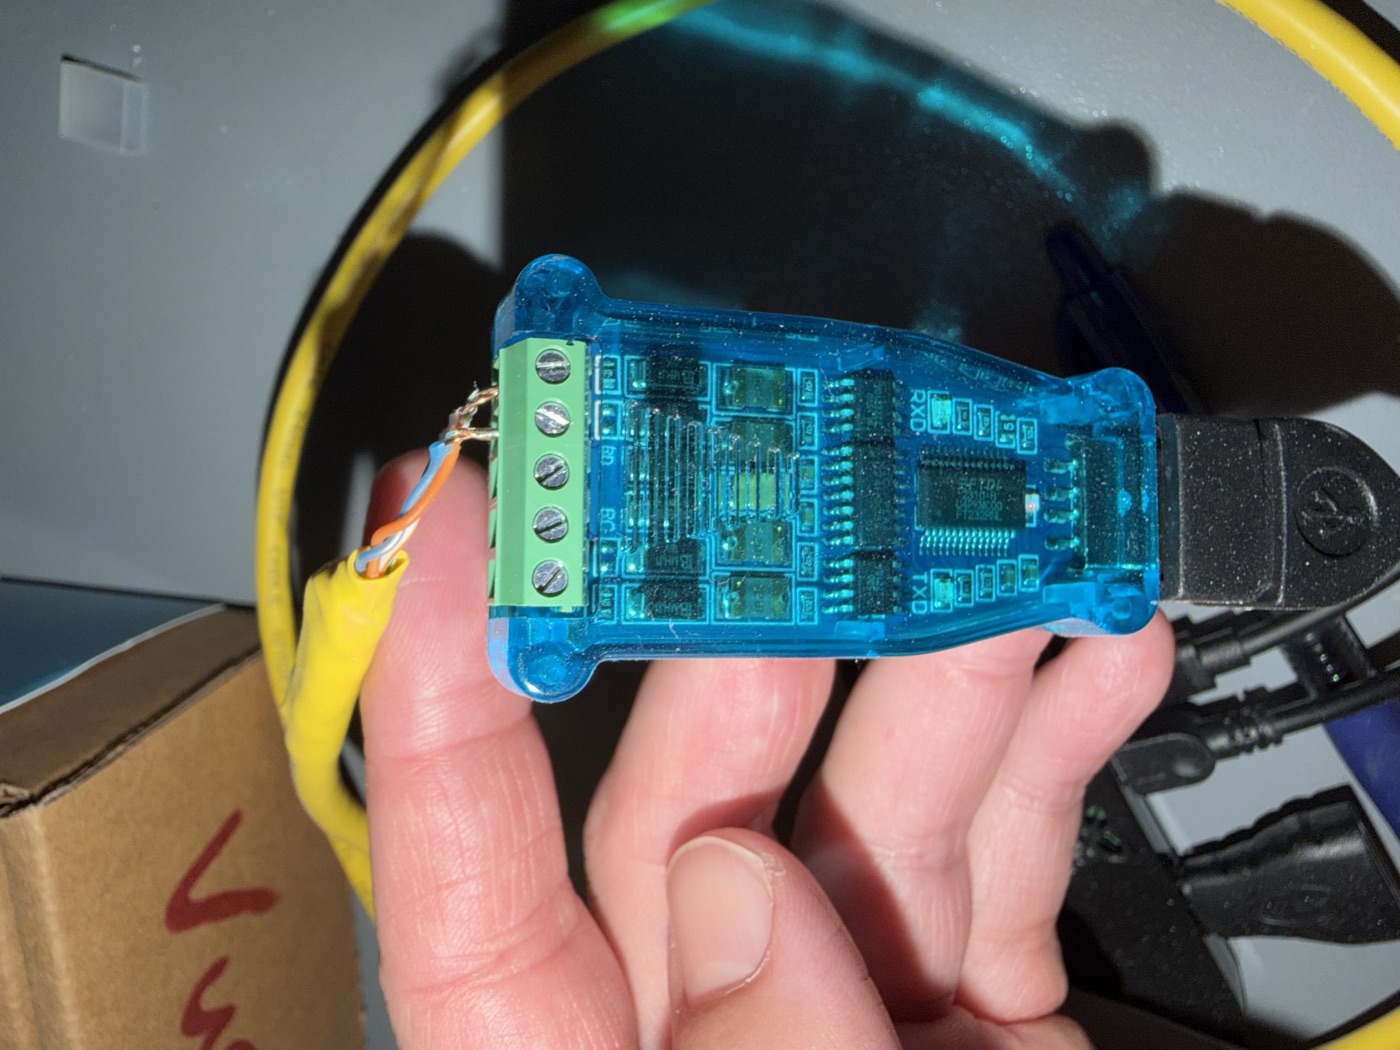
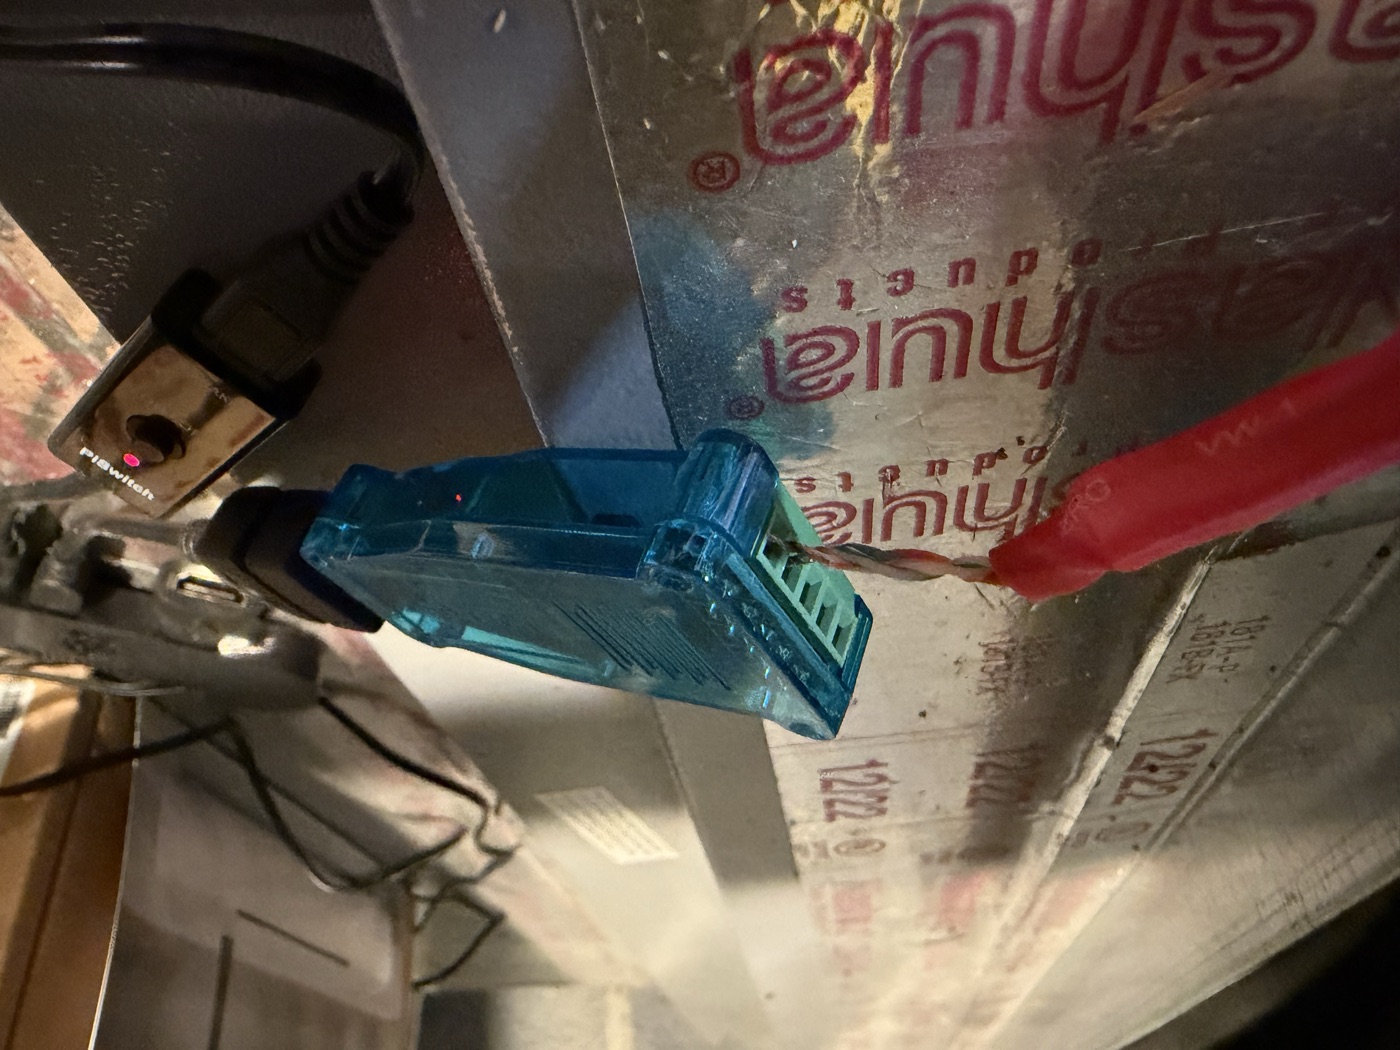
GND only if
your board exposes a dedicated communications ground.
Plug the adapter into the Pi. It should appear as /dev/ttyUSB0:
ls -l /dev/ttyUSB0Install the sender software
It's pure Python with a single dependency — no Ruby, no compilers, no proprietary tooling. Install Python and the Modbus library, then grab the open-source Jumboshack sender:
# Python 3 + the Modbus library
sudo apt update && sudo apt install -y python3 python3-pip
pip3 install minimalmodbus

# the open-source Jumboshack sender — read every line before you run it
git clone https://github.com/jumboshack/jumboshack-sender.git ~/jumboshack-sender
cd ~/jumboshack-sender
Smoke-test the wiring — read your unit once and print it:
python3 fetch_modbus.py --unit 1If that prints your heat pump's temperatures instead of an error, your wiring is good and the hard part is done. 🎉 The reader is the same code we run on our own units — native Python, read-only, and validated field-for-field against the reference tooling.
Get your token, go live & verify
a. Create a device token
In your Jumboshack Account, add a Location, then add a
Device. You'll see a one-time token that looks like jsk_… — copy it now; it's shown only
once. That token is what ties this Pi's data to your account.
b. Point the sender at your account
Drop your token and the ingest URL into ingest.env (it's gitignored — your token never
leaves the Pi):
# ~/jumboshack-sender/ingest.env
INGEST_TARGETS=cloud
INGEST_URL_cloud=https://ingest.jumboshack.com/api/ingest/geothermal
INGEST_TOKEN_cloud=jsk_your_device_token_here
c. Dry-run first
Send one reading with ?validate=1 — it parses and checks your payload but stores nothing,
so you can confirm the plumbing before you commit:
curl -X POST "https://ingest.jumboshack.com/api/ingest/geothermal?validate=1" \
  -H "Authorization: Bearer jsk_your_device_token_here" \
  -H "Content-Type: application/json" \
  --data @sample-reading.json
A "valid": true response means you're good. (Full payload shape and every accepted field
are in the API guide.)
d. Schedule it every minute
Run crontab -e and add:
* * * * * /home/pi/jumboshack-sender/run.sh > /home/pi/jumboshack-sender/lastrun.log 2>&1Within a minute, your dashboard lights up — live temperatures, power, pressures, flow, and a schematic of your loop. From here, History and Cost fill in on their own, day after day.
Troubleshooting
- No
/dev/ttyUSB0? Re-seat the adapter; rundmesg | tailto see if it enumerated. Some adapters need thech341or FTDI driver (usually built into Raspberry Pi OS). fetch_modbus.pyerrors or times out? Almost always A/B swapped — try flipping the two data wires. Double-check GND and that the air handler is powered.401from the ingest API? The token is wrong or truncated — re-copy it from Account (add a fresh device if it's lost, since it's shown only once).429? You're pushing too fast. One reading every 15–60s is ideal; the rate limit is 120/min per device.- Readings arrive in bursts, or the dashboard goes stale then recovers? Usually WiFi power-save napping the Pi's radio. Turn it off —
sudo iw dev wlan0 set power_save off— and make it persistent (a small@rebootcron or a systemd service). For an always-on sensor, wired Ethernet — or locking the Pi to one strong nearby access point — is even more reliable.
Want the shortcut?
Don't feel like sourcing parts? We're putting together pre-configured Jumboshack kits that stream out of the box. Tell us about your setup and we'll get you sorted.
Ask about a kit